
What Is Multi-User Mode in QuickBooks and When Should You Use It?
 Depending on how many licenses you have QuickBooks, you may be able to switch from single-user mode to multi-user mode. This alternative mode lives up to its namesake by supporting multiple users. Not all businesses are run by a single person. If your business has multiple owners, executives or even employees, you may want to take advantage of multi-user mode. You can use it to extend company file access to other people with whom you operate your business.
What Is Multi-User Mode?
Multi-user mode is a feature in QuickBooks that allows multiple users to access the company file simultaneously. The default mode for QuickBooks, of course, is single-user mode. In single-user mode, only a single user can access the company file at any given time. Multi-user mode is an alternative mode that allows multiple users to access the company file simultaneously.
How Multi-User Mode Works
Multi-user mode works by extending company file access to multiple users. All of your business’s financial transactions and accounting information are stored in the company file. If you have multiple licenses, you can switch from single-user mode to multi-user mode. Once in multi-user mode, other users will be able to log in and access the company file at the same time.
According to Intuit, multi-user mode is designed for use on a shared network environment. You’ll need to set up a host computer on a network. The host computer will share the company file with all other users.
To switch to multi-user mode, click the “File” menu in QuickBooks. You should see an option for “Switch to Multi-User Mode.” Selecting this option will convert your account to multi-user mode. You can switch back to single-user mode by repeating the process, in which case you should see an option for “Switch to Single-User Mode” under the “File” menu.
Benefits of Multi-User Mode
With multi-user mode, you can work on the company file at the same time as your accountant or other relevant professionals. You won’t have to wait until your accountant is finished working on the company or vice versa. When set to multi-user mode, multiple users will be able to access and work on the company file.
You can also set different access levels for different users. You may want to assign other users limited access, for instance. Therefore, they won’t be able to perform the same administrative-level tasks as you while working on the company file.
Have anything else that you’d like to add? Let us know in the comments section below!

How to Create a Purchase Order From an Estimate in QuickBooks
 Purchase orders are commonly used to purchase business-to-business (B2B) goods and services. As the name suggests, they are orders that tell vendors what products or services a business wants to purchase. They typically include the name of the product and the desired quantity. While you can always create purchase orders from scratch, though, another option is to create them from an estimate. QuickBooks Desktop makes it easy to create purchase orders from estimates.
Overview of Estimates
Estimates, of course, are quotes for products or services. A vendor may provide you with an estimate. If you’re satisfied with the quoted price, you can then proceed to purchase the products or services at the quoted price. If you use QuickBooks Desktop, you can turn estimates such as this into purchase orders.
Turn on Purchase Orders
You’ll need to turn on purchase orders in QuickBooks Desktop before you can create them from estimates. To turn on purchase orders, access the main menu in QuickBooks Desktop and choose “Preferences,” followed by “Inventory.” After turning on purchase orders, you can proceed to create them from scratch, or by using estimates.
Create a Purchase Order From an Estimate
Assuming you’ve turned on purchase orders in QuickBooks Desktop, you can now create them from estimates. Pull up the estimates window and select the “Create Purchase Order” option. Next, you’ll need to choose either “For all allowed items on the estimate” or “For selected items…” If the products are from a single vendor, select the former option. If the products are from multiple vendors, select the latter option. When finished, click “OK.”
QuickBooks Desktop will then prompt you to enter some information about the purchase order. You’ll need to complete the required fields, after which you can click “Save.”
Track the Purchase Order
You can also track purchase orders in QuickBooks Desktop. Tracking purchase orders is a breeze. Just pull up the “Lists” menu and choose “Customer & Vendor Profiles,” followed by “Purchase Orders.” You can then change the filter options so that QuickBooks Desktop only shows your open purchase orders.
Many businesses use purchase orders when buying B2B goods and services. Purchase orders signal the intent to purchase one or more products or services. In QuickBooks Desktop, you can create them from scratch, or you can create them from estimates.
Did this tutorial work for you? Let us know in the comments section below!

How to Track Subcontractor Payments in QuickBooks
 Do you outsource some of your business’s operations to subcontractors? Not all workers are classified as employees. In the United States, most workers fall under the category of employee or subcontractor.
Employees are workers who are on a business’s payroll and receive wages and other employee-related benefits. Subcontractors are not on a business’s payment. They still work for other businesses, but Subcontractors have autonomy. They can choose which jobs they want to perform, and they aren’t eligible for employee-related benefits. If your business relies on the services of subcontractors, you’ll need to track their payments. Fortunately, QuickBooks makes it easy to track subcontractor payments.
Ask Subcontractors to Complete a 1099
You should ask all subcontractors who you are planning to pay at least $600 per year to complete a W-9. You can download a blank 1099 at the official Internal Revenue Service (IRS) website. This form is required for subcontractors.
Add Subcontractors as Vendors
For QuickBooks Desktop, the easiest way to track subcontractor payments is to add them as vendors. You can create a separate vendor in QuickBooks Desktop for each of your business’s subcontractors. Vendors are typically associated with manufacturers or product suppliers, but you can use them for other purposes, such as subcontractor tracking.
To add a subcontractor as a vendor in QuickBooks Desktop, click the “Vendors” menu and select “Vendor Center.” Under “New Vendor,” select “New Vendor.” Next, enter information about the subcontractor in the appropriate fields. When you are finished, click “OK” to complete the process.
Tracking Subcontractor Payments: What You Should Know
You can track subcontractor payments by going back to the “Vendor Center” and clicking “Edit” next to the subcontractor’s name. In the “Tax Settings” tab, click the box for “Vendor eligible for 1099.” You can then enter the subcontractor’s tax identification number.
QuickBooks Desktop will begin to track the subcontractor’s payments after you enter his or her tax identification number. And when it’s time to file the subcontractor’s 1099 with the IRS, you can pull these payments automatically.
A tax identification number is a unique number that the IRS uses to record revenues for subcontractors. Employees will typically have an employee identification number, whereas subcontractors will have a tax identification number. When tracking subcontractor payments, you’ll need to enter their tax identification numbers in QuickBooks Desktop.
Did this tutorial work for you? Let us know in the comments section below!

What Are Instant Deposits in QuickBooks?
 If you’re tired of waiting several days or longer for customers’ payments to show up in your bank account, you may want to use instant deposits. It’s a feature in QuickBooks Desktop. Assuming you use QuickBooks — and you have a QuickBooks Payments account — you can enable instant deposits. What are instant deposits in QuickBooks exactly, and how do they work?
Overview of Instant Deposits
Instant deposits are exactly what they sound like: deposits that land in your bank account almost instantly.
As a business owner, you’ll probably have to collect payments from customers or clients. Electronic payments, however, may take two or more days to show up in your bank account. With instant deposits, you won’t have to wait. Instant deposits show up in less than a half-hour.
How the Instant Deposits Feature Works
You might be wondering how the instant deposits feature works. QuickBooks will use one of your debit cards to facilitate customer payments if you enable instant deposits. In other words, one of your debit cards will be used to instantly deposit money into your bank account.
How to Get Started With Instant Deposits
Instant deposits is a QuickBooks feature. It’s available in QuickBooks Online and QuickBooks Desktop. But you’ll need QuickBooks and a QuickBooks Payments account to use instant deposits.
To get started with instant deposits, navigate to the “Customers” section in QuickBooks and select “Credit card processing.” Look for an option labeled “Record Merchant Service Deposits.” After clicking this option, select the “Get set up” link under the instant deposit section.
You’ll have to specify a debit card when setting up instant deposits. As previously mentioned, QuickBooks will use one of your debit cards to instantly deposit money into your bank account. You can use either a Visa or Mastercard debit card. When setting up instant deposits, QuickBooks will ask you to enter your debit card number and other information. After linking your debit card to your QuickBooks account, instant deposits will be enabled.
To receive an instant deposit, navigate to “Customers” and choose “Credit card processing.” Next, click “Record Merchant Service Deposits.” You can then choose “Get it fast” for the instant deposit option. When finished, the deposit should show up in your bank account within a half-hour. QuickBooks will simply use your debit card to facilitate the payment.
Did this tutorial work for you? Let us know in the comments section below!

How to Record Project Expenses in QuickBooks
 You can use QuickBooks to track business-related expenses. The popular accounting software even supports project expenses. Projects, of course, often require a financial investment. If your business has been hired to complete a project for a customer or client, you’ll probably have to spend money on related goods and services. These are expenses, and like most expenses, they are typically tax deductible. How do you record project expenses in QuickBooks exactly?
Create an Expense Transaction
Before you can record a project expense in QuickBooks, you’ll need to create an expense transaction for it. Expense transactions, of course, are expenses. When you create an expense transaction in QuickBooks, you can add it to a bill or purchase order. Start by creating an expense transaction for each project expense that you want to record.
Add the Expense Transaction to the Project
Now you can add the expense transaction to the project. In QuickBooks Online, this is done by clicking “Bookkeeping” and choosing “Transactions,” followed by “Expenses. Under the “Expenses” tab, open the transaction associated with the expense.
For the “Customer/Project” section, click the drop-down menu and select your project. Next, click the “Invoice, receive payment” option. You can then enter information about the expense transaction.
Keep in mind that you’ll need to repeat these steps for each expense transaction. Projects often have dozens of expenses. For each of these expenses, you’ll need to create a separate expense transaction and add it to the appropriate project. Thankfully, QuickBooks makes this process easy.
How to Turn On Projects
You can only record project expenses if this feature is enabled on your account. You can turn on projects by clicking “Settings” and choosing “Account and settings.” Under the “Advanced” tab, click the “Edit” button next to “Projects.” You should see an option to turn on “all job-related activity in one place.” After enabling this feature, click “Save” to complete the process. Projects should now be enabled on your account, in which case you can record expenses and other information associated with your project.
With projects enabled on your account, you can create new projects under the “Business overview” section. Clicking “Projects” and then “Start a project” will allow you to create a new project. And once created, you’ll be able to expense transactions to it. Expense transactions represent the costs incurred by your business when completing a project for a customer or client.
Did this tutorial work for you? Let us know in the comments section below!
How to Track Loans in QuickBooks
 If your business is financed with a loan, you’ll need to track it. Thousands of businesses use loans to finance their operations. Whether you obtain a loan from a bank or private lender, though, you’ll have to repay it. QuickBooks, however, makes it easy to track loans. Assuming you use QuickBooks Desktop, you can track one or more loans by following these steps.
Create a Liability Account
Like other forms of debt, loans are liabilities. Therefore, you’ll need to create a liability account to track a loan. This is done by clicking the “Lists” menu in QuickBooks and selecting “Chart of Accounts.” On the following screen, right-click a blank area of the screen and choose “New.” Now you can choose from one of several types of liability accounts.
Create a Vendor
You’ll need to create a vendor to track the loan as well. The vendor is the bank or lender from which you obtained the loan. To create a vendor in QuickBooks, click the “Vendors” menu and select “Vendor Center.” Upon choosing “New Vendor,” you’ll have to enter some information about the bank or lender, such as its name. You can also enter additional information like the vendor’s phone number and email address.
Create an Expense Account
An expense account is necessary when tracking a loan in QuickBooks. You can use the expense account to record interest payments and other fees. To create an expense account in QuickBooks, click the “Lists” menu and select “Chart of Account.” After right-clicking a blank area of the screen, choose “New.” You can then choose “Expense,” followed by “Continue.”
All loans in QuickBooks require a liability account, a vendor and an expense account. Liability accounts represent the actual loans. Vendors represent the banks and lenders that offer loans to businesses. Expense accounts, conversely, are used to record interest payments and other fees.
Recording Loans: What You Should Know
Assuming you have a standard cash loan, you can record it by navigating to the “Banking” menu and selecting “Make Deposits.” You’ll need to record a deposit to your business’s bank account. For the “From account” field, choose the liability account. The liability account, of course, is the bank or lender. You can then enter the amount of the loan in the “Amount” field. The loan will now be recorded in QuickBooks.
Did this tutorial work for you? Let us know in the comments section below!
How to Use Journal Entries for Negative Deposits
 Do you have one or more deposits with a negative balance in your QuickBooks account? Deposits should have a positive balance. If a deposit has a negative balance, you’ll need to resolve it. In QuickBooks, you can use journal entries to resolve deposits with a negative balance. Below is a step-by-step tutorial on how to use journal entries to resolve deposits with a negative balance.
Step #1) Create a Journal Entry
Start by creating a new journal entry. You can create new journal entries in QuickBooks Online by clicking the “+ New” link, followed by “Journal Entry” under the “Other” menu.
QuickBooks will prompt you to enter some basic information about the journal entry. You’ll need to enter a date, for instance. The date should be that on which the transaction took place. You’ll also need to enter the amount of the deposit under “Debits.” For the first distribution field, choose “Undeposited Funds.” And for the “Account” column, choose your bank account.” After entering all of the necessary information, click “Save and close” to complete the process.
The journal entry will offset the negative deposit. You can’t deposit a negative amount of money into a bank account. With a journal entry, though, you can change the balance. QuickBooks supports the use of journal entries to resolve negative deposits. While they support many different uses, journal entries offer an easy way to resolve negative deposits.
Step #2) Link the Journal Entry to the Payment
Now that you’ve created a journal entry, you’ll need to link to the payment. The goal is to achieve a $0 balance for the deposit. If a deposit has a negative balance, you can use a journal entry to increase it and, thus, make the balance $0. This requires linking the journal entry to the payment.
You can link the journal entry to the payment by clicking “+ New” in QuickBooks Online and selecting “Bank Deposit” under “Other.” Just choose the payment and the journal entry. That’s all it takes to resolve a negative deposit in QuickBooks.
In Conclusion
You can resolve deposits with a negative balance by using journal entries. It’s a quick and easy process. All you need to do is create a journal entry and then link to it to the payment. The journal entry will change the balance of the deposit to $0.
Did this tutorial work for you? Let us know in the comments section below!
What Is Receipt Capture in QuickBooks and How Does it Work?
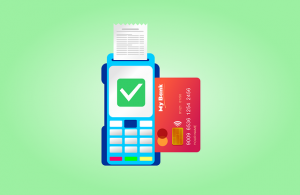 If you use QuickBooks to track your business’s financial transactions, you should take advantage of receipt capture. It’s a native feature in the popular accounting software. Whether you use QuickBooks Desktop Premier Plus, QuickBooks Desktop Enterprise, QuickBooks Online Plus or QuickBooks Online Advanced, it will offer receipt capture. What is receipt capture exactly, and how does it work?
What Is Receipt Capture?
Receipt capture is a feature in QuickBooks that allows you to record expenses by uploading photos of receipts. When you purchase products or services for your business, you’ll typically get a receipt. Rather than manually entering these expenses into your QuickBooks account, you can use receipt capture. You can upload photos of the receipts to your QuickBooks account. Receipt capture will then create the appropriate expense records by pulling information from the photos.
If you’re tired of manually entering expenses, you should consider using receipt capture. It’s an easier, faster way to record expenses. Receipt capture will automatically create expense records; you just need to upload the receipts to your QuickBooks account.
How Receipt Capture Works
Receipt capture works by creating expense records based on the information included in the uploaded photos. You can take a photo of a receipt, for instance, and then upload it to your QuickBooks account. QuickBooks will then create an expense record for it. With receipt capture, you won’t have to manually enter expenses. This innovative feature automates the process of recording expenses. You just need to take photos of your expenses and upload them to your QuickBooks account.
Tips on Using Receipt Capture
Receipt capture is available in both the desktop and cloud-based versions of QuickBooks. If you use QuickBooks Online, you can access this feature by clicking “Bookkeeping,” followed by “transactions” and then “Receipts.” You should see an upload option. You can either upload receipt photos from your computer or from your Google Drive account.
QuickBooks Online, of course, has a mobile app. Rather than logging directly in to your account, you can use the mobile app to upload receipt photos. Simply launch the mobile app and click the menu icon. Next, choose “Receipt snap.” As long as your mobile device has a camera, you can use the QuickBooks Online mobile app to take photos of receipts. After you’ve snapped a photo, click “Use this photo.” The photo will be uploaded to your QuickBooks account where it’s used to generate an expense record.
Did this tutorial work for you? Let us know in the comments section below!

How to Show Multiple Tax Rates on Invoices in QuickBooks
 Do you need to show multiple tax rates on an invoice? Invoices are bills that request a payment from customers. After performing a service for a customer, you can send him or her an invoice. The invoice should include a list of the service or services performed for the customer as well as the taxes. While most invoices will typically have a single tax rate, though, some of them may have multiple tax rates. If you use QuickBooks Desktop, you can show multiple tax rates on invoices by following these steps.
Create Sales Tax Items
Start by creating a sales tax item for each sales tax that you want to show on the invoice. To show two sales tax rates, for instance, you’ll need to create two sales tax items.
You can create sales tax items in QuickBooks Desktop by navigating to “Lists” and choosing “Item List.” Next, right-click an open space in the window and select “New.” You can then choose “Sales Tax.” After completing the necessary fields, the new sales tax item will be added to your account. Make sure you create a sales tax item for each sales tax that you want to show on the invoice.
Create a Subtotal Item
You’ll also need to create a subtotal item. Go back to the “Lists” menu and choose “Item List.” Right-click any open space in the window and select “New.” For the item type, choose “Subtotal.” QuickBooks Desktop will ask you to enter some information about the subtotal. You’ll have to enter an item name or number, for instance, as well as a description. When finished, click “OK” to complete the process. The subtotal item should now be added to your account.
Create the Multi-Tax Invoice
Assuming you’ve already created the sales tax items and subtotal item, you can now create the multi-tax invoice. Go to the “Customers” menu and choose “Create Invoices.” You can now enter the sales tax items. You should enter all of the sales tax items that you want to show on the invoice — the same sales tax items that you previously created.
Entering the subtotal item will generate a subtotal for the invoice. The invoice should contain all of the sales tax items as well as the subtotal. After completing the invoice, click “Save & Close.” You can now send it to the customer.
Did this tutorial work for you? Let us know in the comments section below!

Why QuickBooks Isn’t Using Your Email Template (And How to Fix It)
 You don’t have to send generic-looking emails when using QuickBooks. By creating a template, you can customize the appearance of your emails. QuickBooks supports email templates. An email template is a design framework that serves as the basis for your emails. It will be applied to all of your emails, thus eliminating the need for generic-looking emails.
Email templates are available under the “Company Preferences” tab. You can create an email template by clicking the “Edit” menu in QuickBooks Desktop and choosing “Preferences.” Next, click the “Send forms” menu, followed by the “Company Preferences” tab. You should see an “Email Templates” menu. From this menu, choose a transaction type and select “Add template.” QuickBooks will then allow you to design a template. You can upload a logo, edit colors, reposition elements and more.
Even if you create an email template, though, certain problems may occur that prevent QuickBooks from using it. Rather than using the email template, QuickBooks will use the default, generic design.
Manually Copy and Paste
Syntax problems may prevent QuickBooks from using your email template. A simple solution is to manually copy and paste the email with your desired template. Pull up the email template by clicking “Edit,” followed by “Preferences.” After navigating to the “Company Preferences” tab, select the email template that you want to use and click “Edit.” Now you can copy the email.
With the email copied, click “File” and choose “Sen Forms.” Pasting the email should result in the message and template being transferred. Clicking “Send Now” will complete the process by sending the email. As long as you copied and pasted it, the email should feature your template.
Place It Back in Queue
Rather than manually copying and pasting, you can place the email back in queue. If QuickBooks isn’t using your template, it may have encountered a problem when attempting to send it.
To place the email back in queue, open the transaction with which the email is associated. Find the box labeled “Email Later” and click it to remove the checkmark. Next, click “Save & Close.” Go back and reopen the transaction and click the “Email Later” box so that the checkmark returns to it.
The transaction should be placed back in queue. QuickBooks will resend the email with your preferred template.
It’s fru
Did this tutorial work for you? Let us know in the comments section below!
