

What Is the ‘Master Admin’ User in Quickbooks?
 If you use Quickbooks Online, you may come across a user type known as the master admin. All Quickbooks Online accounts have a master admin. The master admin is at the top of the account type totem pole. To learn more about the Master Admin, including how to change it, keep reading.
Overview of the Master Admin
The master admin is the user with the highest level of permissions and privileges in Quickbooks Online. Intuit’s cloud-based accounting software supports several types of users, including accounting firms and standard users. The master admin is above all of these users. He or she can access every feature in Quickbooks Online, including all of the respective business’s accounting data.
Quickbooks Online restricts businesses to having a single master admin. You can’t create two or more master admins. Rather, you can only create a single master admin. When you subscribe to Quickbooks Online, you’ll create a master admin. While you change the master admin — meaning you transfer the account to someone else — you can’t add new master admins to Quickbooks Online.
How to Change the Master Admin
Most businesses won’t need to change their master admin. Business owners who subscribe to Quickbooks Online will typically retain their master admin accounts. Nonetheless, there are instances in which a business may want to change its master admin. If your business appoints a new executive leader, for instance, you may want to give him or her access to the master admin. You can change the master admin in just a few easy steps.
Start by signing in to Quickbooks Online as the master admin. From the “Settings” menu, click “Manage users,” followed by “Add user.” You can then select “Company admin” and “Next.” In the next field, enter some basic information about the user, including his or her email address, after which you can click “Save.” Quickbooks will then send the user an email with a link. Upon receiving this email and clicking the link, the user will become the new master admin.
If the user whom you want to make the master admin is already added to your Quickbooks account, go back to “Manage users” and find the user in the “User Type” column. After finding the user, click the drop-down arrow for “Action” and change his or her user type to “master admin.”
Have anything else that you’d like to add? Let us know in the comments section below!

What Is the Realization Principle in Accounting?
 Have you heard of the realization principle? It’s a common concept used in accounting. Many businesses use it to determine when revenue has been earned. To learn more about the realization principle and how it’s used in accounting, keep reading.
Overview of the Realization Principle
The realization principle is an accounting concept that involves the recognition — or the realization — of revenue when purchased products are delivered or when purchased services are completed. In other words, businesses don’t consider revenue to be earned until one of these actions has occurred.
A customer may pay for a product or service. Until the product has been delivered or the service has been completed, though, the business doesn’t consider the revenue to be earned. With the realization principle, revenue is only earned after the delivery of a product or the completion of a service.
Benefits of Using the Realization Principle
Using the realization principle offers several benefits. The main benefit is healthier financial records. It offers a clearer and more accurate representation of your business’s finances.
Just because a customer pays you for a product or a service, your business may not generate from it. The product could get lost or damaged during shipping. Alternatively, the customer may cancel the service before you have a chance to complete it. Regardless, there are instances in which your business may not generate revenue from a purchased product or service. If you recognize revenue as earned prematurely, it will throw off your business’s financial records. The realization principle offers a solution. This concept ensures that your business doesn’t recognize revenue as earned until the delivery of a product or the completion of a service.
Tips on How to Use the Realization Principle
There are a few things you should know when using the realization principle. For starters, you must track the dates when products are delivered and services are completed. After all, this is the basis on which the realization principle works. You’ll have to track the dates when products are delivered and services are completed to effectively use the realization principle in your business’s accounting strategy.
The realization principle works on a simple concept: revenue isn’t considered earned until the purchased product has been delivered or the purchased service has been completed. It’s designed to provide a better overall picture of your business’s finances by showing the true amount of revenue your business has earned.
Have anything else that you’d like to add? Let us know in the comments section below!
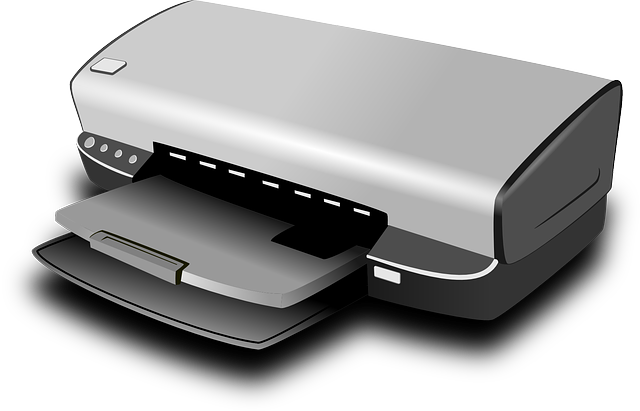
How to Fix Misaligned Documents Printed Quickbooks
 Are your paychecks, invoices or other documents printed in Quickbooks misaligned? Because these documents are a representation of your business, you shouldn’t use them if they are misaligned. They may contain all the necessary information, but they’ll create a poor brand image for your business. Fortunately, you don’t have to replace your printer. Instead, you can adjust the alignment of your existing printer.
How to Adjust Printer Alignment in Quickbooks
To adjust the alignment of your printer, you’ll need to access the “Print setup” feature in Quickbooks. You can find this feature in Quickbooks Online by logging in to your account and choosing “+ New,” followed by “Print Checks.” At the bottom of this screen is “Print setup.”
Upon clicking the “Print setup” button, choose “No, continue setup” at the bottom. You’ll need to click this link twice to initiate the adjustment feature. Next, click the grid and drag it to the square. The location of the grid inside the square will affect your printer’s adjustment. When you move the grid, Quickbooks will adjust your printer. Therefore, you should place the grid exactly inside the square for optimal adjustment.
Test Your Printer
After performing the adjustment described above, you can test your printer by printing a sample page. This is done by accessing “+ New” and choosing “Print Checks,” followed by “Print Setup” and then “View preview and print sample.” Ideally, the sample should come out of the printer aligned and without any unwanted distortion. With that said, you may need to adjust it one or more additional times.
If the sample is still misaligned, go back and perform another alignment using the steps mentioned above. Adjusting the alignment of a printer takes time. Whether you do it in Quickbooks or any other program — or even your computer’s operating system — you may have to perform several adjustments. Quickbooks makes it easy to perform these adjustments, however. Once you print a properly aligned sample page, click the option for “Finish Setup.”
In Conclusion
Depending on how your business operates, you may not need to use the print feature in Quickbooks. Many businesses are now paperless, meaning they use digital documents like email rather than paper documents. If your business uses paper documents, though, you’ll need to ensure they aren’t misaligned.
Did this tutorial work for you? Let us know in the comments section below!

Items vs Expenses in Quickbooks: What’s the Difference?
 When using Quickbooks to keep track of your business’s finances, you’ll probably come across items and expenses. Quickbooks offers items and expenses to track costs incurred by your business. Items and expenses aren’t the same, however. They are designed for different purposes, and to use them correctly, you must learn the nuances between items and expenses.
What Is an Item?
An item is any recorded product or service that your business purchases or sells. Quickbooks offers several item types, including service, inventory part, non-inventory part, other charge, subtotal, group, assembly and more. If your business buys or sells a product or service, you can record it as an item.
To create an item in Quickbooks, click the “Lists” menu and choose “Items.” You can then select the option for “Item,” followed by “New.” Quickbooks will prompt you to select the type of item you wish to create. Next, complete the fields for the item, after which you can click “Save” to complete the process.
What Is an Expense?
An expense is a cost incurred by your business. It may consist of anything from rent or lease payments, utilities, office supplies, legal fees, cleaning service and more. All businesses incur expenses. When you spend money on services such as these, you should record them as expenses. Quickbooks offers a separate area for recording expenses.
To create an expense in Quickbooks, click the (+) icon and select “Expense.” You can then enter information about the expense, such as the payee or vendor. You’ll also need to select a payment account with the date of purchase and payment method. After entering the required information, click “Save and close” or “Save and new.”
Comparing the Differences Between Items and Expenses
Items are used for any product or service that’s directly related to your business’s operations. If your business buys 100 units of a product to resell for a profit, you should record those product units as items. You’ll be reselling them in hopes of generating a profit, so they are considered items. Expenses, on the other hand, don’t affect your business’s revenue-generating capabilities. You’ll still have to pay for expenses — and in many cases expenses are essential to keeping businesses up and running — but you don’t resell or other turn expenses.
Another difference between items and expenses is that the former supports tracking. If your business operates from multiple locations, you can use items to track specific products or services sold from each location.
Have anything else that you’d like to add? Let us know in the comments section below!

What Is Liquidity in Business Accounting?
 Have you come across the term “liquidity” when researching accounting activities? If so, you might be wondering what it means. No matter what type of business you operate, it probably has at least some liquidity. All businesses, including business-to-consumer (B2C) and business-to-business (B2B), have liquidity. With that, some have greater liquidity than others. So, what is liquidity, and how does it related to your business’s activities?
Overview of Liquidity
Liquidity is a measurement of how fast your business can convert its assets into cash. Whether you realize it or not, your business probably has assets that can be converted into cash. Examples of common assets owned by businesses include stocks, real estate, inventory, equipment and patents. Not all assets can be converted into cash immediately, though. You’ll typically need to sell them to generate cash. The time it takes to convert assets into cash is described as liquidity.
The Importance of Liquidity
Liquidity is important because it can help your business cover liabilities. Your business will inevitably incur debt when executing its respective operations. According to Fundera, in fact, seven in 10 small businesses have outstanding debt that haven’t paid back. Allowing debt to go unchecked, of course, can cut into your business’s profit margins. Lenders and vendors often charge interest on outstanding debt. The longer a debt goes unpaid, the more interest you’ll have to pay on it. If your business has excellent liquidity, you can use the cash generated from the sale of assets to pay off some or all of your business’s debt.
How to Improve Your Business’s Liquidity
Even if your business has poor liquidity, there are steps you can take to improve it. Reducing overhead, for example, will naturally have a positive impact on your business’s liquidity. Overhead consists of ongoing expenses that aren’t directly related to your business’s money-making activities. While you can’t always eliminate all overhead expenses, you can often reduce them. Canceling unnecessary services and changing utility companies can reduce your business’s overhead and, therefore, improve its liquidity.
If your business uses invoices, you can improve its liquidity by collecting from delinquent customers or clients. Customers and clients don’t always pay invoices on time. They may allow invoices to go unpaid longer after the due date. By collecting payments from these customers or clients, your business’s liquidity will increase.
Have anything else that you’d like to add? Let us know in the comments section below!
How to Record an Owner’s Reimbursement in Quickbooks
 Have you used your own money to cover one or more business-related expenses? You aren’t alone. Countless business owners tap into their personal funds. When using your personal funds for business-related expenses, though, you’ll typically need to record the transactions as an owner’s reimbursement.
Once you’ve used your own money to pay for a business-related expense, you should reimburse yourself for the transaction. Reimbursement means transferring money from your business’s bank account to one of your own personal bank accounts. Of course, you’ll need to then record the reimbursement in your Quickbooks account. Doing so will ensure that your Quickbooks account recognizes the reimbursement. You can record an owner’s reimbursement in just a few simple steps.
Create a Journal Entry
To get started, you’ll need to create a journal entry for the transaction. In Quickbooks Online, you can create new journal entries by clicking the (+) sign at the top of the page and choosing “Journal Entry.” From here, enter an expense account, after which you can debit the total amount of the transaction in the first field. You can then choose “Owner’s Equity,” followed by entering the same amount from the previous field. When finished, click “Save and close” to finish the journal entry.
Record the Reimbursement
After creating a journal entry, you can now record the reimbursement. This is done by clicking the (+) sign once more and selecting “Expense.” You should now see an option to select your bank account. For this option, choose the bank account from which you were reimbursed for the transaction. When you reimburse yourself for a business-related expense, you’ll use a bank account that’s connected to your business. You should choose this bank account when recorded an owner’s reimbursement.
Upon selecting “Expense” and choosing your bank account, you’ll need to choose “Owner’s Equity.” Next, enter the amount of the transaction. You can complete the process by selecting “Save and close.” The owner’s reimbursement should now be recorded in your Quickbooks account.
In Conclusion
An owner’s reimbursement is a transaction between your business bank account and your own personal bank account. When you use money from your personal bank account to pay for a business-related expense, you should reimburse yourself. This involves transferring money from your business’s bank account back into your personal bank account. If you use Quickbooks, you can record owner’s reimbursements such as this using the steps listed above.
Did this tutorial work for you? Let us know in the comments section below!

Positive vs Negative Cash Flow: What’s the Difference?
 Cash flow offers an accurate representation of your business’s profitability. Regardless of what products or services your business sells, you can use this metric to determine whether your business is succeeding or failing at generating profits. Cash flow, however, can have a positive or negative value. For effective cash flow management that helps your business succeed, you must understand the differences between positive and negative cash flow.
What Is Positive Cash Flow?
Positive cash flow means your business received more cash — or other assets for than matters — during a given period than what it spent or incurred during the same period. All businesses have incoming and outgoing cash. Incoming cash refers to payments from customers or clients as well as money generated from other business-related activities, such as investing. Assuming your business’s incoming cash is greater than its outgoing cash, the value of its cash flow will be positive.
What Is Negative Cash Flow?
Negative cash flow, on the other hand, means your business spent or incurred more money during a given period than what it generated or otherwise received. A negative cash flow is concerning because it indicates your business is spending more money than it’s making. If your business has some cash reserves, it may be able to weather a short period of negative cash flow. Eventually, though, it will need to change its practices to achieve positive cash flow. Allowing negative cash flow to go unchecked for an extended period will quickly drain your business’s finances. Negative cash flow, in fact, is a common reason why small businesses fail.
Tips to Improve Your Business’s Cash Flow
Even if your business’s cash flow is negative, there are ways to turn it around. For example, you may be able to improve your business’s cash flow by switching utility companies. If your business operates out of an office or building, shop around for different utility providers. With a little luck, you may find a new utility provider that offers a lower price than your business’s current provider.
Another way to improve your business’s cash flow is to lease equipment rather than buying it. When you lease equipment, you’ll essentially pay to use it. Therefore, it’s almost always cheaper in the short term to lease rather than buy equipment. The only downside is that you won’t own the equipment when you lease it. You can also send invoices to customers and clients more quickly. The sooner a customer or client pays, the better.
Have anything else that you’d like to add? Let us know in the comments section below!

How Does Accounts Receivable Financing Work?
 A bank loan isn’t the only way you can finance your business’s operations. There are alternative financing options available, one of which is accounts receivable financing. If your business uses invoices to collect payments from its customers or clients, you can use accounts receivable financing. With that said, you might be wondering how this alternative financing method works exactly.
The Basics of Accounts Receivable Financing
Accounts receivable financing involves tapping into your business’s unpaid invoices for financing. There are private financing companies that specialize in accounts receivable financing. They will either buy your business’s unpaid invoices — typically at a slightly lower rate than their face value — or they will loan you money using your business’s unpaid invoices as collateral.
Under the former option, you’ll obtain money by selling unpaid invoices to a private financing company. The financing company will essentially buy your business’s unpaid invoices. Under the latter option, you’ll obtain money in the form of a loan by using your business’s unpaid invoices as collateral. You’ll still have to pay back the loan, but you’ll get immediate cash that you can use to finance your business’s operations. There are the two basic methods used for accounts receivable financing.
Advantages of Accounts Receivable Financing
Many businesses struggle to collect payments from their customers or clients. With accounts receivable financing, you don’t have to waste time or resources trying to collect payments. You can simply sell the unpaid invoices to a private financing company.
Accounts receivable financing is also faster than traditional financing methods, such as bank loans. It can take well over a month for a bank to approve your business for a traditional loan. In comparison, private financing companies may approve your application for accounts receivable financing in just a few weeks. If your business is in dire need of immediate cash, accounts receivable financing can be an attractive choice for this reason.
Disadvantages of Accounts Receivable Financing
Accounts receivable financing, of course, is only an option if your business uses invoices. If customers or clients pay upfront, you won’t be able to use this alternative financing method.
If you intend to sell your business’s unpaid invoices, it’s important to note that you won’t get the full value for them. Private financing companies make money by buying unpaid invoices at a lower value.
Have anything else that you’d like to add? Let us know in the comments section below!

What Is a Credit Memo in Quickbooks?
 Have you come across credit memos when using Quickbooks to track your business’s financial transactions? If so, you might be wondering what they are. Based on the name alone, many business owners assume that credit memos are nothing more than notes used for reference purposes. Credit memos, however, can actually affect account balances. So, is a credit memo exactly, and when should you use them?
Overview of Credit Memos
A credit memo is essentially a note stating that your business owes a customer money. Maybe a customer returned a product, or perhaps the customer was overcharged for a product. Regardless, if your business owes a customer money, you can create a credit memo to adjust his or her account.
Credit memos add a negative balance to the customer’s account. When you create an invoice for a customer, it will add a positive balance to his or her account. Credit memos work in the opposite way by adding a negative balance to the customer’s account.
How to Create a Credit Memo in Quickbooks Desktop
If you use Quickbooks Desktop, you can create a credit memo by selecting “Create Credit Memos/Refunds” under the “Customers” menu. Next, you’ll need to select the customer for whom you are issuing the refund under the “Customer:Job” menu. After entering the product or products associated with the refund, click “Save & Close.”
You aren’t out of the woods just yet. Quickbooks will now ask you to choose from one of three supported refund methods. You can choose to issue the refund as credit, give the customer an actual refund, or apply the refund to one of the customer’s outstanding invoices.
If you issue the refund as credit, the customer will be able to apply it on future purchases. Giving the customer a refund, on the other hand, means he or she will receive a payment for the amount of the credit memo. Finally, applying the refund as an invoice credit will offset the balance of the customer’s unpaid invoice. You can use any of these three methods to handle money owed to a customer.
In Conclusion
A credit memo is a note stating that your business owes money to a customer. In Quickbooks, they are used to add a negative balance to a customer’s account. When you create a credit memo for a customer, his or her account will receive a negative balance in the amount of the credit memo.
Have anything else that you’d like to add? Let us know in the comments section below!

What Is an Expense Account in Quickbooks?
 As a business owner, you’ll have to purchase products and services to facilitate your business’s operations. All businesses have expenses; it’s a regular part of running a business. You can keep track of your business’s expenses, however, by using the expense account feature in Quickbooks. To learn more about expense accounts and how they work in Quickbooks, keep reading.
Overview of Expense Accounts
In Quickbooks, an expense account is a category of transactions that’s used to track your business’s expenses. You’ll find expense accounts located on your business’s balance sheet. Alternatively, you can run a report of your business’s expense accounts by clicking “Reports,” followed by “Profit and Loss.”
Expense accounts allow you to categorize your business’s expenses. If you own a restaurant, for instance, you may want to create expense accounts for food deliveries, utilities, lease payments and payroll. Rather than grouping all these expenses together, you can categorize them into the appropriate expense account. Quickbooks doesn’t restrict you to using expense accounts for any specific type of expense. You can create and use an expense account for any type of expense. Therefore, they are a versatile accounting tool that can help you keep track of all your business’s expenses.
Expense vs Income Accounts: What’s the Difference?
In addition to expense accounts, Quickbooks supports the use of income accounts. As you may have guessed, income accounts are the opposite of expense accounts. While expense accounts are used to track expenses, income accounts are used to track revenue.
Most businesses, of course, make money through different channels. Even if your business sells a single product, it may generate sales through its brick-and-store as well as its website. Expense accounts allow you to separate these channels, thereby revealing which channel yielded the most sales during a given period and which channel yielded the least sales. You can even use an expense account to track income generated from franchising activities.
Running a Profit and Loss report in Quickbooks will reveal both your business’s expense accounts and its income accounts.
When using expense or income accounts, try to use a familiar structure that’s easy to recognize. In other words, don’t place a transaction into an account unless it’s an appropriate fit. If you have an expense account for payroll, only place payroll transactions into that account. Otherwise, it will throw off the account’s true total.
Have anything else that you’d like to add? Let us know in the comments section below!